
本教程介绍如何使用 Windows terminal + oh-my-posh 来美化命令行终端,并介绍一些基本的参数配置
安装 Windows Terminal
Windows Terminal 可以在 Microsoft store 中直接搜索下载,win11用户自带 windows terminal 不需要进行下载。
Windows Terminal 会默认加载 powershell,当然我们也可以使用其他的shell,比如zsh等等
安装oh-my-posh
安装 winget(可选)
在powershell中输入:
1 | winget |
然后我们可以看到下面的提示信息: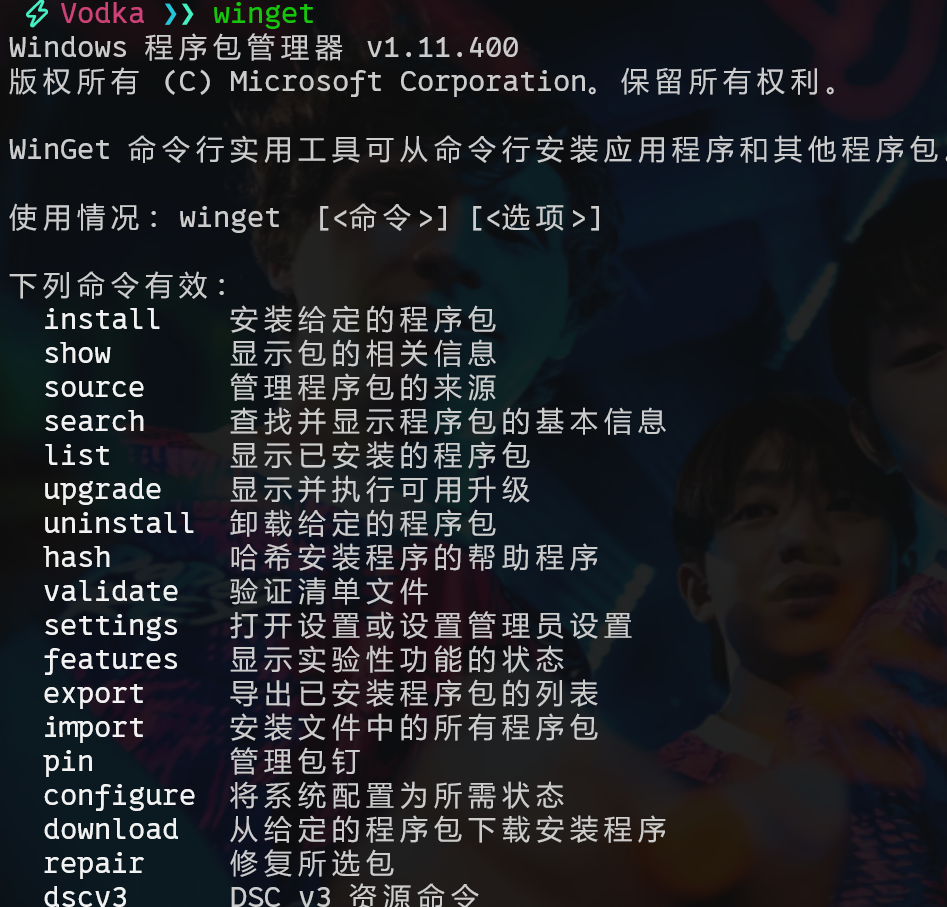
这就显示我们的系统中已经安装了winget
如果显示识别不了的命令,我们可以进入 Microsoft store 搜索 “应用安装程序”,点击安装,安装完成后重启powershell,再次运行winget应该可以显示命令了。
安装 oh-my-posh
1.命令行安装
在powershell中输入
1 | winget install oh-my-posh |
如果显示有多个源,挑选其中一个 ID,然后输入
1 | winget install <ID> |
即可安装 oh-my-posh
2.Microsoft store 安装
如果命令行安装有问题的,可以直接在 Microsoft store 中搜索 oh-my-posh 进行安装
编写 PROFILE 文件
$PROFILE是 powershell 的配置文件路径,指向一个.ps1脚本,每次启动powershell时都会自动执行这个脚本文件
所以 oh-my-posh 的执行逻辑实际上每次启动 powershell 时,运行 $PROFILE 文件,使编写在脚本中的命令执行,实现oh-my-posh
我们在 power shell 中直接运行
1 | $PROFILE |
可以查看 $PROFILE 的路径
我们输入
1 | code $PROFILE |
进行编写 $PROFILE 文件
如果没有 vscode,可以输入
1 | notepad $PROFILE |
进行编写
第一次打开$PROFILE时应该是一个空白文件,将下面这一行加入
1 | oh-my-posh init pwsh --config $env:POSH_THEMES_PATH\montys.omp.json | Invoke-Expression |
我们可以在oh-my-posh themes中根据自己喜好来选择oh-my-posh主题
将对应的主题名称替换我们这一行中的montys字段即可,因为我这里使用的主题是montys
然后我们重启powershell就可以看到我们的oh-my-posh主题已经启动了
安装并配置 Nerd 字体
安装 Nerd 字体
我们安装 oh-my-posh 之后可能会有图标显示的问题,我们可以安装 Nerd 字体
在powershell中输入:
1 | oh-my-posh font install |
会看到一个字体列表如图: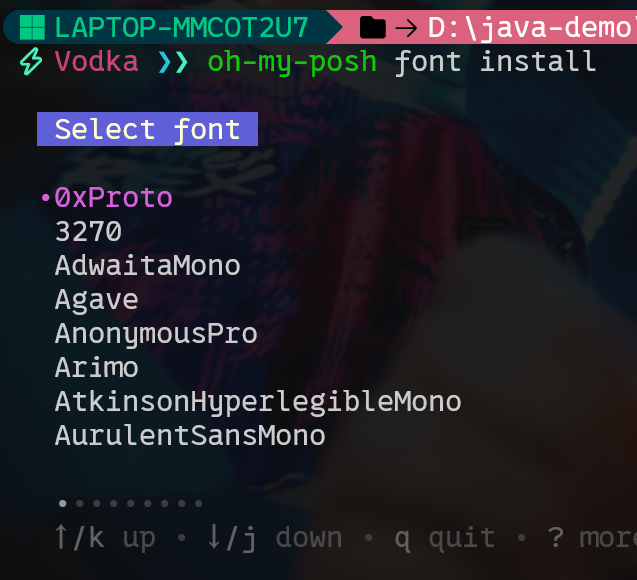
选择我们想要使用的即可
当然你也可以在programming fonts中来预览各个字体
配置 Nerd 字体
我们点击命令行窗口最上方的下拉栏,然后点击“设置”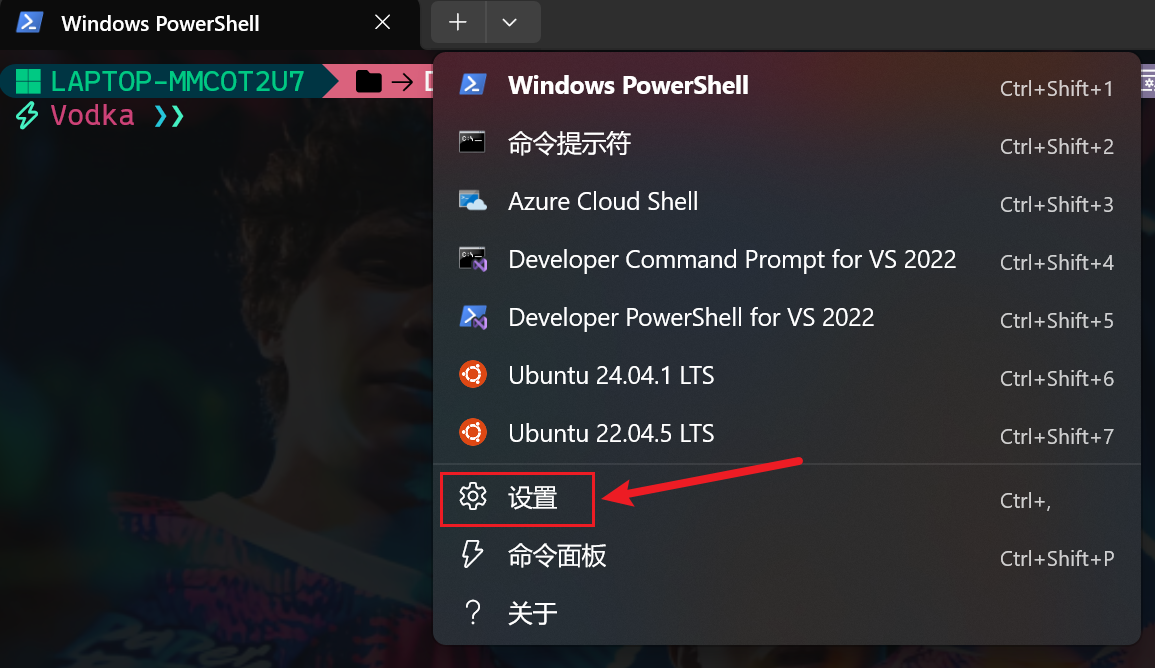
再点击左下角的打开JSON文件 ,我们可以编辑命令行窗口的配置文件
我们找到"profiles"字段,这个字段中第一个是default,我们在default中加入
1 | "fontFace": "0xProto Nerd Font" |
我们这里就让终端使用了0xProto Nerd Font字体,图表显示就不会出现问题了
如果你已经安装了喜欢的字体,可以输入win+r输入fonts就可以看到自己安装的所有字体了
配置其他参数
除了配置 oh-my-posh,我们还可以配置一些终端窗口的自带参数,可以在settings.json文件的default中加入下面的参数
配置背景毛玻璃效果
1 | "useAcrylic": true, |
通过调整acrylicOpacity的大小,可以调整背景的不透明度
配置背景图片
1 | "backgroundImage": "<文件路径>" |
通过调整backgroundImageOpacity可以调整背景的亮度
其他配置
其他细节配置可以参照下面的表格,一般美化用到上面的配置即可
| 字段 | 类型 | 说明 |
|---|---|---|
colorScheme |
string | 设置颜色主题(比如 "One Half Dark") |
cursorShape |
string | 光标形状:bar, vintage, filledBox, underscore 等 |
cursorColor |
string | 光标颜色(如 "#FFFFFF") |
fontSize |
number | 字体大小 |
fontWeight |
string | 字体粗细,如 normal, bold, thin, semi-bold |
padding |
string | 终端内容边距,如 "8, 8, 8, 8"(上、右、下、左) |
backgroundImageStretchMode |
string | 背景图缩放方式:none, fill, uniform, uniformToFill |
backgroundImageAlignment |
string | 背景图对齐方式,如 "center", "topLeft", "bottomRight" |
background |
string | 纯色背景(使用 hex 色值) |
scrollbarState |
string | "visible", "hidden", "visibleAlways"(控制滚动条) |
antialiasingMode |
string | "grayscale", "cleartype", "aliased"(字体抗锯齿方式) |
intenseTextStyle |
string | "bold", "bright", "all" 控制高亮文字显示风格 |
语法建议模块
在$PROFILE中加入下面的内容:
1 | Import-Module PSReadLine |
可以启用基于历史的语法建议模块
设置语法高亮
1 | Set-PSReadLineOption -Colors @{ |
我们可以改变后面的颜色名称来修改对应的颜色